
Hey there!
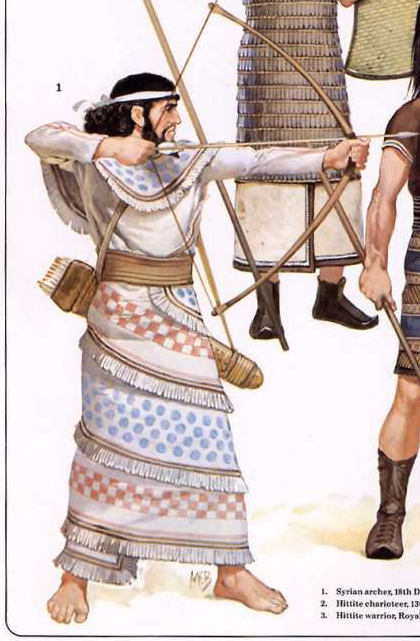
Today I decided to start work on a small personal project of mine to create a few pieces of ancient Assyrian clothing, ones that wrap around the legs over and over from the waist till near the feet. I'm wondering how this kind of tunic is constructed. I personally think it's two pieces of rectangular cloth wrapped around each other? I could be wrong and it might be one long piece?
My second question is this - how exactly do you wrap a very long piece of cloth, over and over again, like in the reference image below without having to simulate + manually drag + freeze over and over? Is there an easier way to do it that I am unaware of that puts it into this sort of position I want automatically and then simulate? If not, does anyone know of any techniques to make that simulating + dragging + freezing easier, as it keeps falling off whenever I try to do it?
Notes
• I've noticed that the Assyrian tunic seems to wrap around over and over. What / Where it's all being held together, I do not know, but that's just how it looks like and I intend to somehow re-create it with the limited visual information I have (I haven't been able to find any documents on how this type of garment could be re-created or any real-life references of someone actually wearing something like this). I imagine there's something that would hold it together though; warriors would have needed to be able to run + perform very agile manoeuvres wearing this type of clothing and I imagine they wouldn't have worn it at all if it proved to be totally impractical.
• I think there's another piece of cloth wrapped over the shoulders? Or is this part of the same garment?
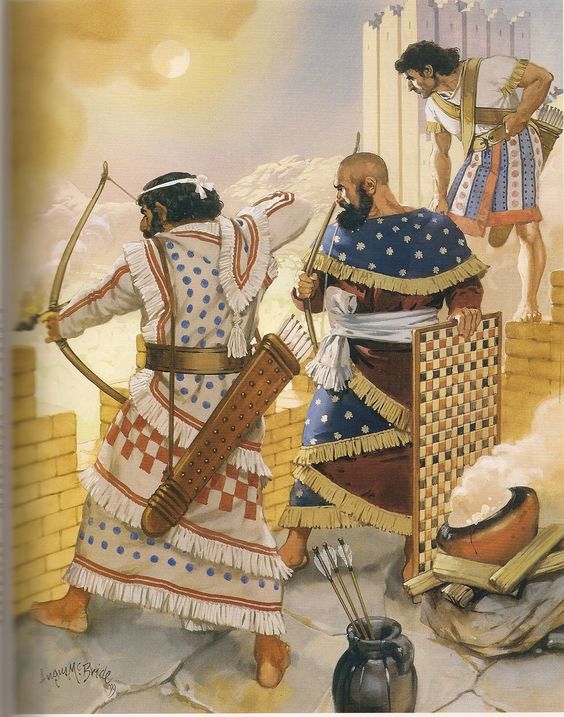
EDIT: I think it's part of the same garment; I found another angle showing the back (last picture) and it seems to flow up the back and then over the shoulders. The second guy next to him has something similar, but has - like I predicted - two clearly different pattern pieces of clothing. One of them looks like it's a part of the shirt (same colour)? Crazy.
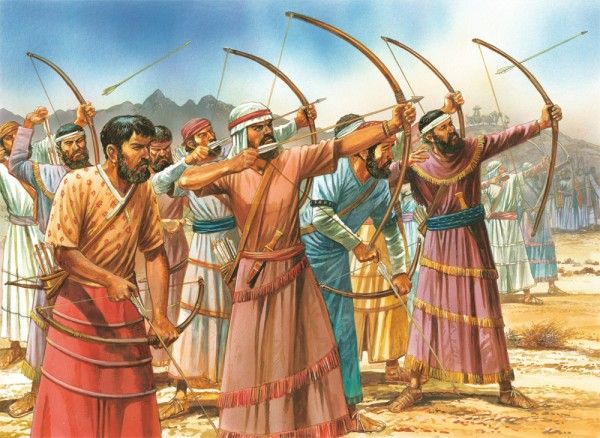
References (Illustrations)
While it *can* be done by wrapping, it is probably more efficient to fake it. Sew each 'layer' to the one above/below. Hide the seams with the fringe. End up with the torso pieces being loose.
I ran into the same issue many years ago with a Chinese dress style. I did it both ways. (Let me dig up the pictures... be right back.)
Here is the 'faked' version of a Chinese Hanfu dress.
Hmm. Can't find the fully wrapped version quickly. I must have it archived somewhere, and will have to dig for it.
But I can say that it does get pretty hard to manipulate the cloth. You best bet is to play with the Bounding Volumes/Arrangement Points and the wrapping it can do. Start with the torso BV. Create a long horizontal rectangle of cloth and assign it to the BV such that there will be overlap (MD will spiral the overlap for you).
Then, change the Orientation setting (found in the Property Editor under Arrangement) so there is a spiral effect. From there, you can manipulate easier to your final liking. I would suggest lowering the cloth on the vertical axis at this stage, so it does not interact with the arms, then do the hand-controlled manipulation to get it over the torso and shoulders.
A few last words. Some of your reference pics are not to be taken as fully informational. The artist(s) may not have fully understood the way the garment is held together, and did some faking of their own to create the image.
You may want to create a separate skirt and torso for this style, as that may be easier to control. Hide the join with the wide belts shown, or cover the waistband with the torso piece hanging over it.
Hey Rosemary, thanks again for the really useful information! That twirling shape using a rectangular pattern is exactly what I was looking for; I can basically do that for the initial shape then droop the top half it over the shoulders manually with the bottom half frozen. As you say, I can make a separate fringe to cover up any odd areas behind the twirl if I need to stitch for whatever reason while doing it. I also agree in that I should probably do the skirt separately from the top half; it'll make it easier to control, plus I can hide it with the different variations of belts I'll be putting on the final characters around the waist area.
Yes, you are also right about the references - I had a feeling that the artist who created these illustrations may have taken some artistic license themselves and faked it a bit as you said, but it's unfortunately the only semi-realistic styled depiction of that tunic I've seen before so far; the rest are just stone-like reliefs which aren't any better.
I'll start work on this tunic in a couple days time and show you the final results!
Here are a few more construction tips to help.
Use the Tack to Avatar tool to hold up the cloth to the torso.
Then, use some pins to mark the waistline. On the 2D pattern, lay down an internal line where the pins are, then remove the pins. Apply an Elastic effect to that line.
You may need to adjust thing afterwards, but this will help the construction a good deal more.
And a further, fun historical tip... here's the drawing I based that Chinese dress on. I assume it's fairly accurate, since the original image was in Chinese. ;)
サインインしてコメントを残してください。