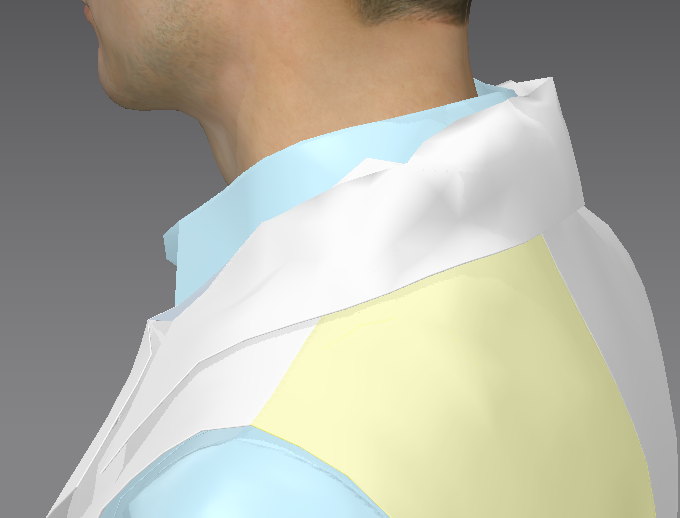
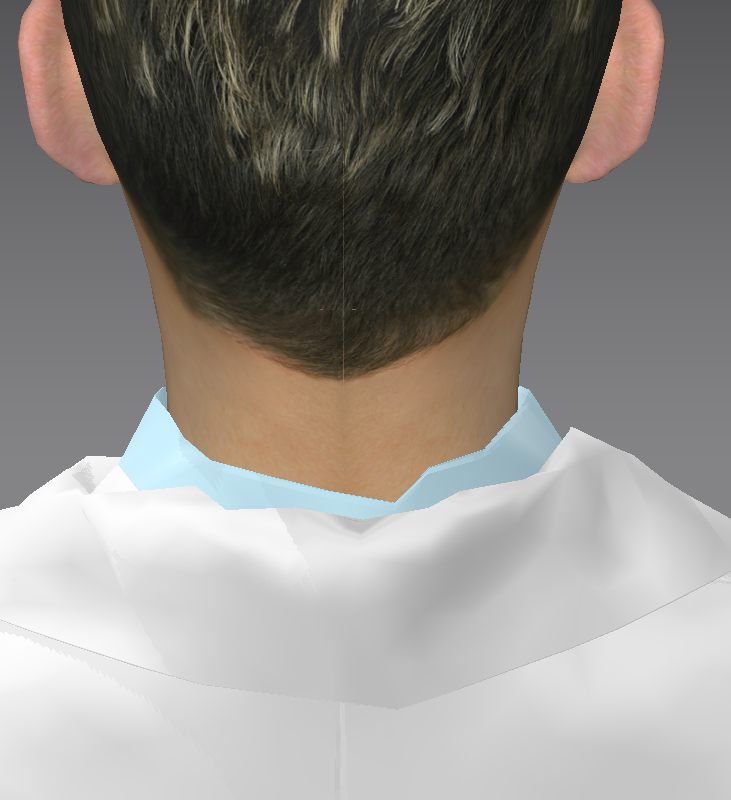
probelms of ruffles occure especially when sewing the collar to the collarstand, even when lengths are equal.
Thanks for help....
CD PROJEKT®, Cyberpunk®, Cyberpunk 2077® are registered trademarks of CD
PROJEKT S.A.
© 2021 CD PROJEKT S.A. All rights reserved. All other
copyrights and trademarks are the property of their respective owners.

probelms of ruffles occure especially when sewing the collar to the collarstand, even when lengths are equal.
Thanks for help....
Reduce your particle distance size from 20mm down to 5mm for the collar patterns.
Make sure you set the sewing line and seam angle correct in that collar area.
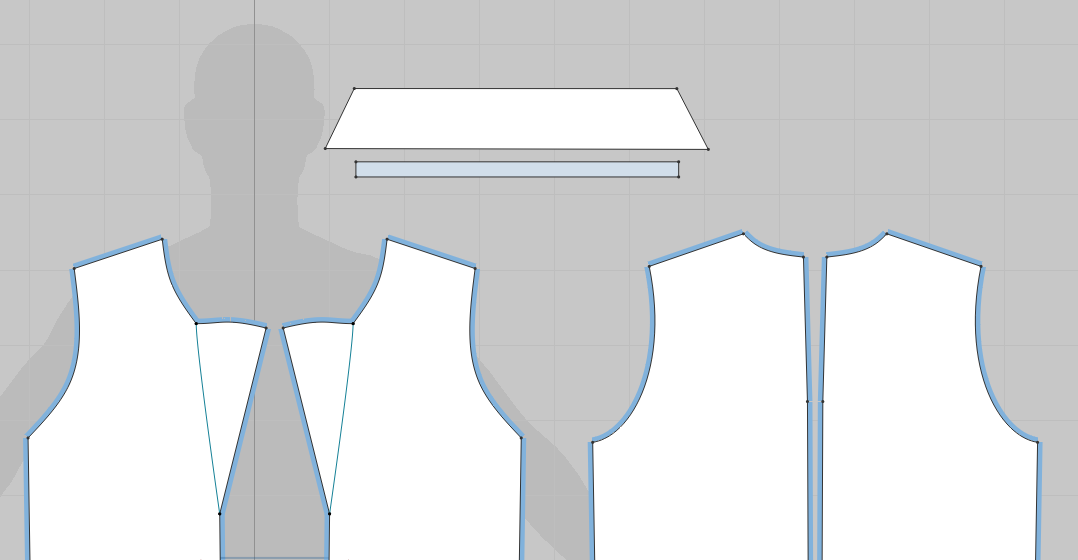
It is not actually ruffles that is the problem. A collar actually forms a sort of cone around the neck. Your straight patterns are trying to fold themselves more into that cone shape. The odd look is due to the poly size you are working with. Try putting a bit of a curve on both the collar and the collar stand. Something like this:
See settings:
Measure
Create simple pattern with fold line (or could be 2 pieces sewn together - with line line adjusted to fold angle). Align to neck using arrangement point at rear of neck. (note the pattern should be like Rosemaryr states with curvature - but that doesn't mean you cannot use a more simplistic pattern - it's just not good pattern making to use the shape I am about to use - however the principles are the same). You can apply fold angle to two separate patterns that form a collar on the sewing line. Use the (fold type sewing line in that case).
Fold over using fold gizmo tool
Select fold gizmo (red angle) adjust over. (Note how angle value now changes)
Simulate > set fold line to 'crease' and reset fold line strength to '0' value so pleat crease kicks into fold line.
Create a double edge to the single collar pattern for final tweaking
Choose your fabric texture of choice.
BINGO! Finished in 3 minutes.
Please sign in to leave a comment.